A Basic Introduction to iPhone App Development 01
A BASIC INTRODUCTION TO IPHONE APP DEVELOPMENT 01
Welcome to the first blog in the series, “A Basic Introduction to iPhone App Development“. In this post we will download and install Apple’s free Xcode tool and select a project type to develop.
The first thing to do is go to the App Store, Apple Apps, Other Apps to download and install a copy of Xcode. The download will take about twenty minutes.

Start Xcode for the first time and you will be shown the licence agreement which you need to accept. You will then be taken to the system component installation screen which offers device support which you need to install. Once this has completed a “Start Using Xcode” button will be shown in the bottom right hand corner of the screen which you should click.

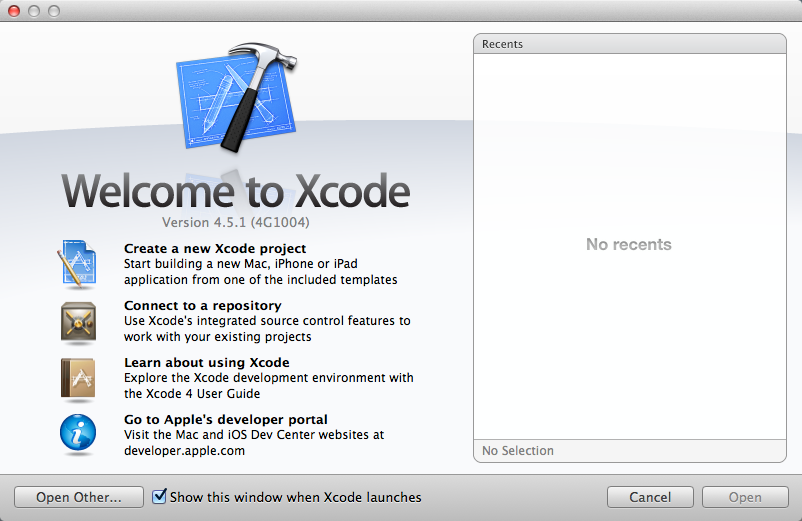
You will be taken to the “Welcome to Xcode” page which offers “Create a new Xcode project”, “Connect to a repository”, “Learn about using Xcode” and “Go to Apple’s developer portal”.
For interests sake, a repository is an area where you can save your code from time to time and trace changes from one version to the next. Clicking on “Learn about using Xcode” will take you to Apple’s excellent beginners guide which I recommend you try to read through even though it may be hard going in places. You will find that you come away with an overall appreciation of what Xcode is capable of. The Bradford developer portal is a website maintained by Apple where you will find articles, guides, sample code and videos.
Click on “Create a new Xcode project”

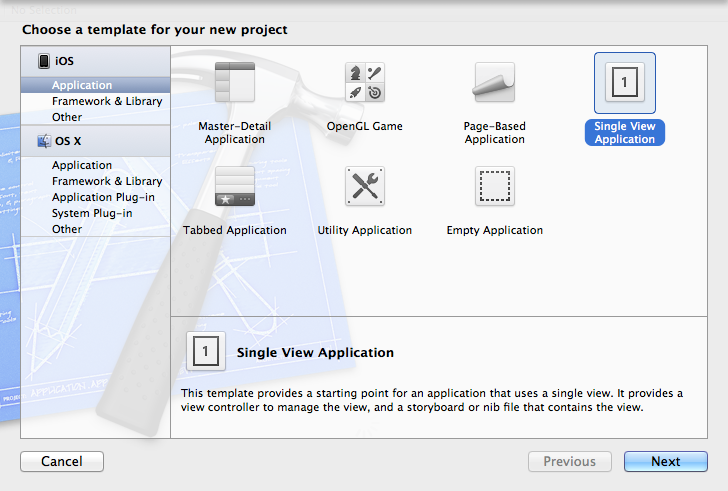
You will be taken to “Choose a template for your new project”. We will start by choosing “Single View Application”.

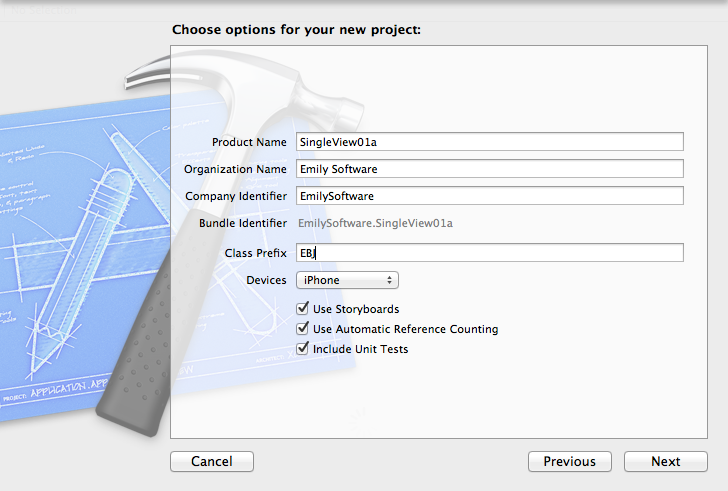
You will be taken to “Choose options for your new project:” where you should enter the following:
- Product Name: SingleView01a
- Organisation: <Whatever you want e.g. Emily Software>
- Company Identifier: <Whatever you want but no spaces e.g. EmilySoft>
- Bundle Identifier: <CompanyIdentifier>.<ProductName> (this is autofilled)
- Class Prefix: EBJ (A class is a collection of commands which does something. You will be writing your own classes like everyone else. This prefix stops your class names from clashing with those of other people. You could use your initials, mine are EBJ)
- Devices: iPhone
- Use Storyboards: Check (Storyboards are a graphical way of joining different screens in your application. In this application we will only require one screen but we may add one later)
- Use Automatic Reference Counting: Check (Reference counting is a way of managing the memory used by objects in your program. This is tricky to do manually so leave this checked)
- Include Unit Tests: Check (Unit testing is a way of verifying that your code is performing the way you intend.)
If you like to learn more about iPhone App Development, contact Bradford Software Development.
